Showing posts with label Before and after. Show all posts

8/31/11


I have about learned to grab the camera and get a "before" shot 
before starting a project, but unfortunately I still forget to
keep snapping all the way through.  Good thing you have a 
good imagination.  It will help you later on in this post.

This little table was on its way out.  It had already made it to the trash
bin, but not all the way to the curb.  The poor little thing was so wobbly
it could hardly stand on it lovely turned legs.

The top was disconnected from the leg and the garish nail holes from a poorly attempted repair were filled with wood putty and sanded.


Now is where you imagine the table top painted white.
Got that?  That will help you recognize it later on.

The edges of a pressed wood letter from 
Hobby Lobby  have been painted pale pink.

The "B" is about to be covered with this gingham paper.

I brushed the letter with Mod Podge then smoothed the paper 
over the letter.

After allowing it plenty of time to dry, I used a sharp blade 
to trim the paper from the back side of the letter.


The edges will be rough.  I simply sanded off the paper remnants
with 220 grit sandpaper.


I attached the "B" to the now-white table top plaque
with hot glue.  

By now, your keen sense of deductive reasoning has 
probably clued you in on what is happening here.

The "is for" is free-handed in pink marker.
Miss B's name is written with stick on letters.

This sweet name plaque is hanging over Miss B's crib
waiting for her arrival, at which time I will
be a liberty to announce what the "B" stands for.

In the meantime, there are a couple more nursery projects
to share in future posts.  I had better get to posting, because 
we are down to just a couple of weeks....or less!

There will be a full nursery tour at Miss B's mama's blog
that I will link to in a future post.


8/25/11

Recipe for success


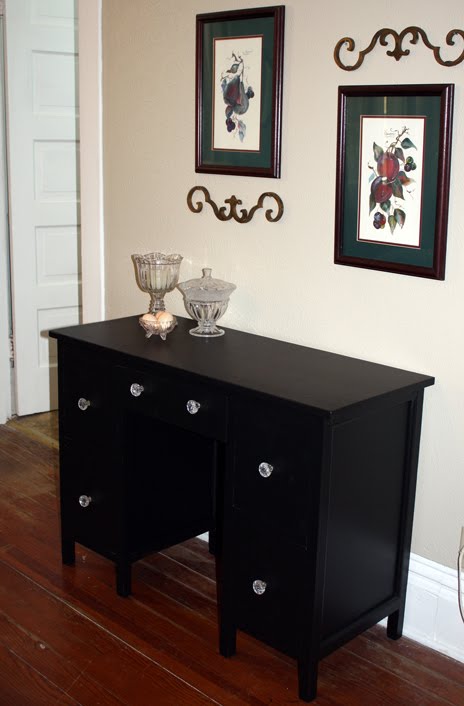
Take one solid wood desk, well used.
Sand remains of stickers and a few screwdriver 
marks off the top surface.

Paint in the carport on the first below 100 degree day
you have in 6 weeks.

Freshen hardware with 
brushed nickel spray paint.


Move into newly painted pink nursery.


We are now minus 30 days and counting on
Operation Granddaughter!


8/17/11

This one's for you, D.


After lunch yesterday my friend and I had just a few minutes
to hit a local thrift store that helps victims of domestic abuse
 where we found this beauty:


 I whacked off the big ol' elastic band, took up the sides,
 narrowed the sleeves and made them three-quarter.


It's made of a soft lightweight silky fabric.
Just right for a little jacket to throw on when
she's working in the super cool AC at the library.


I see more lunch hour thrifting in our future.

8/14/11

Baby butterflies

Technically, not baby butterflies, but butterflies for the baby.
You may or may not have heard that we are soon to be
blessed with a granddaughter!  

After three wonderful, delightful and adorable grandsons, 
we are anxiously awaiting the arrival of a
little bundle of pinkness, bows and lace.

I helped Amy with some nursery preparations this weekend.
She is embracing the butterfly portion of her online persona.
To that end, I have been collecting a wildly colored
 assortment of butterflies.

The motley crew


After a few coats of Krylon's Watermelon pink.....


Pretty delicate butterflies to decorate the nursery.
Even with natural light, I could not get the color right.  
For the true shade, refer to the product image above.


There are more projects I am excited to reveal
 as we continue our decorating.


8/12/11

You never know

I'm considering renaming my blog to something more descriptive of what you find here. These are the possibilities:

A Box of Chocolates

 (because in the words of Forest Gump, you never know what you're going to get.)

or

Monkey See, Monkey Do

(because I just bounce around blogland copying what I see and like.)


As of late, I have been enjoying such blogs as 
and
and

There are tons of them out there--just Google 'refashion'

What these gals do with ugly thrift store clothing is amazing.

You know what's coming, don't you?

Monkey went to the thrift store and tried her hand at it.

Before: a rather tired peasant blouse

What I did to it, in a nutshell
Add a casing and elastic across the top--Viola!

Shirt to skirt!!


Coaching the photographer

I have to wonder if these refashioning gals have as much trouble or hear as much grumbling from their photographers as I did.   ;)  Something tells me they do.  (Thanks, hon!)

7/21/11

Changing time, just because I can


Kristin's run-of-the-mill, off-the-shelf clock,
cute, but suddenly clashed when she moved:


Customized to match her new decor:

Easy Peasy

1. Deconstruct clock
2. Paint the frame
3. Seal with Mod-Podge
4. Cut paper for the face
5. Attach numbers
6. Reconstruct clock

Viola!

6/30/11

Come together

There has been a project waiting in the wings at our house for several months now.
We have a little dinette set that has been around for a few years. 
Even though a couple of the chairs are no longer with us, I was reluctant to part with the sweet little table and remaining chairs.  

The wonderful world of blogging opened up the beauty of painted furniture.  After getting my feet wet with a few miscellaneous pieces, I picked out my next project: the dwindling dinette set.  

All this could not have been accomplished without a lot of hard work by my husband.  Thanks, Bobby!

I mentioned there was more to come about these chairs in my last post.
They collected with a purpose.

A motley crew

Chairs in waiting

The lineup

A "matched" set

Mission accomplished

6/8/11

Be our guest


Many moons ago, someone gave this old desk chair to the library.
It has been shuffled around from one random place to another, 
never having a spot of its own.

Recently, we have been creating cozy little seating niches.
We found a perfect spot for this chair, but it seemed to disappear into 
the oak shelves it sat against.

Since it's finish wasn't in that good a condition,
I decided to give it a white wash.


A little pillow makes it cozy.

5/15/11

From drab to fab


We enjoyed the weekend with Kristin and Matt at their home in Arkansas.
We had planned on some painting projects and the weather
cooperated beautifully!  


We took a sweet little table that had seen a few college years tossed to and fro from this:


to this:


Drab:

to FAB!

Then there was the matter of these chairs, which were the color of dirty dijon:


But no more!


Ta-da!  A cozy eating nook:


Added bonus: they have gorgeous hydrangeas in their yard!


10/30/10

Chandy redux

For the wedding reception, we had the task of transforming a 
very high-ceilinged, multi-purpose facility (gym)
into a beautiful bridal reception venue.
To give the illusion of a lower ceiling and a cozier, less industrial space
we began collecting the biggest brass chandeliers we could find.
We were amazed at the bounty once we began searching and gathered five in all.


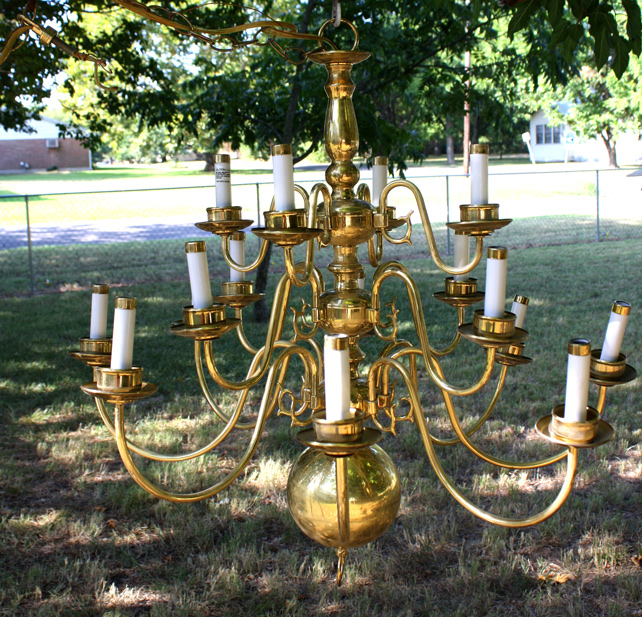
Here is the before of one:
You get the idea.


We hung them outside and went through a bunch of cans of white spray paint.
I found a site online where I ordered dozens of crystals.
The Christmas ornaments came out just in time at Hobby Lobby
for yards of iridescent beads and crystal baubles.


Voila!


We even carried a smaller one on location for the bridal portrait shoot.


It was around these chandeliers we built the whole
shabby chic theme of the wedding and had a great time doing it!


4/22/10

Sooner or Later....Before & After

No explanations.  No excuses.
Just a new post.


This is a desk my maternal grandfather built in 1936.
It has been various shades of blah in my memory.
And living hidden away in the utility room.


Until now!
Hello, pretty!
Welcome to the Family (Room)!


This is a shabby little bench my husband drug in from an estate sale.
There is good potential here.


Ta-Da!


And here is the handsome couple.


Aren't they a lovely pair?

LinkWithin

Related Posts Plugin for WordPress, Blogger...