12/16/10

Too many halls! Too much decking!

Oh, it's all fun and games pulling all this stuff out!
It's all fun and games until December 29th, when it all
has to be put back!

Because 4 days after Christmas is my limit, baby!


But in the meantime, let's enjoy, shall we?

A new look for the baker's cabinet.


On second thought, this garland just might 
get to stick around and see us through some
dark dreary January days.


A new look for the mantle.


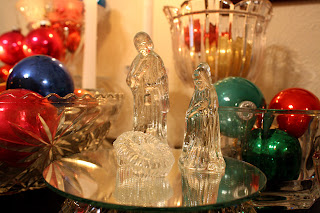
A new location for the grande nativity set.


A new ornament that spoke to my  heart.
The hope of Christmas IS forever--forever with Christ 
purchased by Him on Calvary.
John 3:16


The snowmen are just too many in number to all
get to come out every year.
Here are a few that made it this year.


An entirely new decoration.
White sticks and white lights......
....now, wherever would I have 
gotten such?

Add some blue glitter snowflakes,
viola!
A lovely wintery accessory to compliment the snowmen.


Finally, here is another delicious little ornament
that we didn't have last Christmas.

Our very own Santa-Baby!


Now, that's sweet!

12/15/10

The halls are decked


Some things are the same.........


 Some things are different..............


.....in new places......


Some things are new........


And some things have been repurposed......


Add a little green tinsel and a pasta angel....
Voila!
A glass Christmas tree:


.....to be continued.....

12/8/10

Christmas balls and candlelight

I did some decorating today.
Then I took lots of pictures.

These are vintage ornaments that I've collected
 and a lot of clear glass I gathered up from around the house.

I rather like the combination.

I hope you enjoy.


11/22/10

Back to the Books


Art using books always calls to me.  There is something about that medium I find very appealing.  Maybe because I work surrounded by books everyday but mostly because I've always loved books.  Books are wonderful creatures.  I can't imagine them ever being replaced with electronic media.  I love technology and all its gadgets and conveniences as much as anyone, but as far as I'm concerned, a Kindle is no match for a real live book with real live pages.

Besides, you can't make cool art with a Kindle when it becomes outdated.

I see creating art with old books as a way to give them new life, because while some books are ageless, many others do become outdated.  Part of my job is to discern between the two and keep the library's collection vibrant and relevant.  That results in lots of books that go on the sale table; and just like the awkward kid that is always picked last for the team, there are those books that ultimately get picked over. It is at that point that I begin looking at them not for their old content, but for their size, shape, color, and texture--not for what they were, but for what they can become.  

Somewhere back in all the searching and researching I do, I saw a wall hanging made of book covers.  It stuck in my mental to-do file.  When my daughter recently needed something to fill a blank space on the wall, this image came back to me.  I took pictures along the way to show you how I did it.

Gather some poor outcast books.
I ended up using fifteen for this project.


Using a box knife or X-acto, carefully cut the bound pages from the cover.
The pages come out as a unit, not individually.
*Books that are sewn into the cover will not work*
Cutting at the wrong angle will result in cutting the back off--ask me how I know.


The 'innards' removed:


Arrange the covers insides down.  Stack and overlap until you get a design that pleases you.
I used three large covers on the bottom layer to create a sturdier base to build on.


Once the arrangement suits you, glue to covers together.
There will be places where the covers may not touch without a little pressure.
I emptied my pantry to help out.


I don't usually prime, but it seemed like the thing to do in this case.


Then I sprayed on two coats of Krylon "Ivy Leaf" gloss.
After it was completely dry, I brushed on/rubbed off  Ralph Lauren "Smoke" glaze.


Here she hangs at my house just before moving to her new home.

I'm already thinking of variations : multiple colors? adding "hardware" to the collage? maybe a quote?
We'll see what develops.


11/21/10

Scripture and a Snapshot


While perusing photography sites, I found Katie's meme that spoke to me.
It combines photography and scripture, 2 things I am very interested in.
So I'm linking up.  Go {here} to be inspired by more lovely photos 
and a message from God's word.


11/7/10

Storm's a comin'

A couple of weeks ago, just getting settled back at home from a camping excursion,
my husband calls up the stairs, "Get your camera and come here!"

I've learned this is most likely something weird/cool/spectacular to be seen.

This time it was in the spectacular category.

There was a thunderstorm building behind our house toward the west.

I grabbed this shot, then he says, "Move over here."


Whoa............


The wind was blowing.  Everything had an eerie pink cast to it.


 And there I stood snapping pics of this awesome thunderhead.

We saw a few sprinkles, but the brunt of this big boy went north of us.

11/3/10

Wedding Projects


The chandeliers (previous post) helped set the theme for Kristin & Matt's wedding.
She decided to go with a shabby chic style that lends itself 
to a casual, vintage, handmade look.

The first thing I'm going to show you is actually the last thing I made.
We needed a little extra something-something for the registry table.
At the last minute, I whipped out this little sign and Mod-Podged it to a
shabbyied-up board.


We did the pew bows in a gauzy fabric. The glass bottles were also Mod-Podged with a label we created using their names and wedding date.  Just before the ceremony we popped in a sprig of fresh flowers.


Behind the cake you can see a bit of the lighted tulle wall.
It really softened up the area.

Kristin painted the "I DO" letters in front of the cake and embellished them with rhinestones.


 She attached her great grandmother's brooch to the ribbon on her bouquet.

Since there was a piano in the reception area that would have been murder to move, we pulled it from its crouching position in the corner and decorated it.

I printed the banner on scrapbook paper and strung it on ribbon.


 Instead of crystal flutes, the bride chose antique silver goblets for their official toast.

A very vintage photo-op, courtesy of my dad and his 1928 Model A.

LinkWithin

Related Posts Plugin for WordPress, Blogger...